OmniChannel Commerce provides several ways of moving product between different physical locations, including mobile selling locations. The processes described here are for product that is for sale within your company; for sending product for sale by third party consignees, such as Amazon, a different process is used.
Make sure that you have set your physical locations up correctly via the ‘Inventory Locations’ link on the Setup ribbon. At a minimum to transfer product between locations, you will need a minimum of two locations. A ‘Transfer between Locations’ item is automatically added once you create your first transfer, and cannot be deleted or moved. This is used as a temporary location while inventory is in transit. You also associate a default location to a sales channel (if applicable) in your channels setup, and multiple sales channels can share the same location.
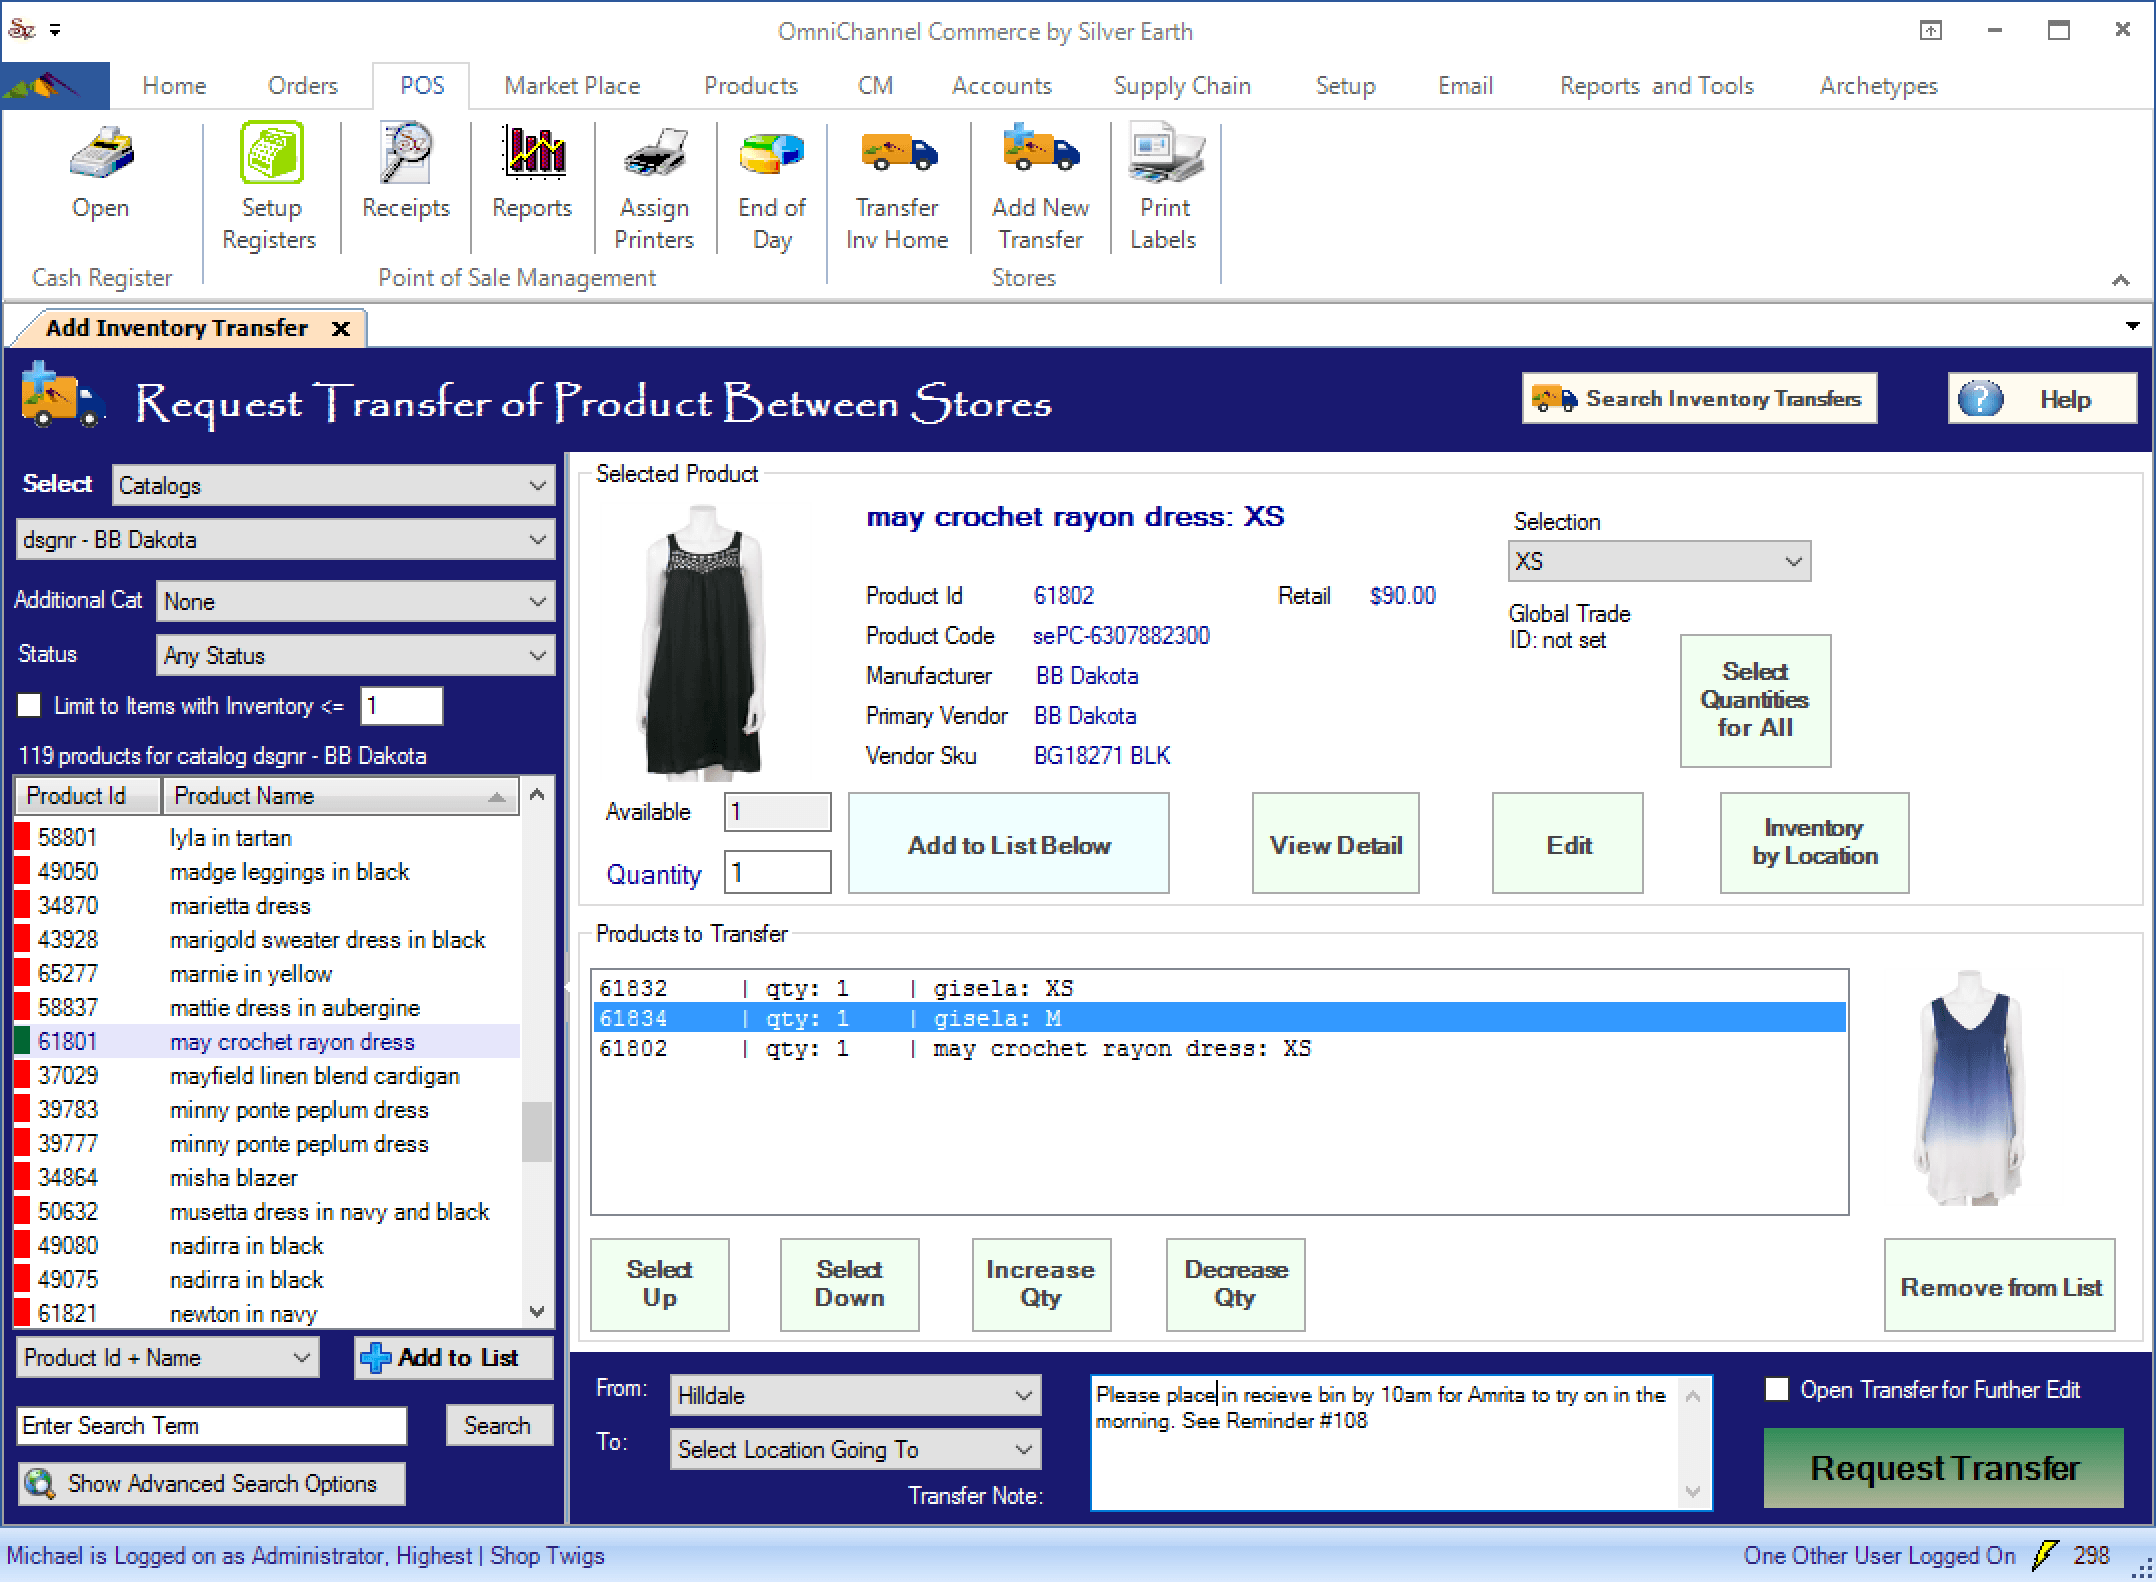
If your global policy allows it, you can move inventory directly between locations on the inventory panels within products management, however a better approach is to create a ‘Product Transfer’, which allows you to track the process. A product transfer can remove product from available inventory during transit (you can override this) and supports workflow steps. For example, a junior cashier can view that a dress is available in a different store, and make a ‘Request’ to have product transferred to their store so that a customer can try it on the next day. Another (or the same person if they have permission) can then send the product between stores, perhaps reserving it in the process.
This is then received at the new location, and product lost in process can be accounted for. You can also edit sent quantities to correct for mistakes. Who and when is recorded for sending, receiving, and edits.
A new request for transfer of inventory is created by clicking on the ‘Add New Transfer’ menu item on the Point-of-Sale ribbon.

Go to Inventory Transfer Home on the Point-of-Sale ribbon to search for existing transfers by a number of filters, as well as being another place you can start a new transfer.
Within a Product Transfer form, on the left side are links for ‘Setup’, ‘Products’, and ‘Sending’. At the top you can view a quick status update, such as if it is In-Transit, Complete, etc., as well as the number of units sent and received. The form adapts according to its status; for example, on the products panel, prior to sending the received and lost columns are not shown. One of the options for sending product, is to instantly transfer it (does not go through a transit process).
All movements of inventory are tracked as read-only transactions which can be filtered for and viewed in the ‘Inventory Transaction History’ report in Reports Home.
