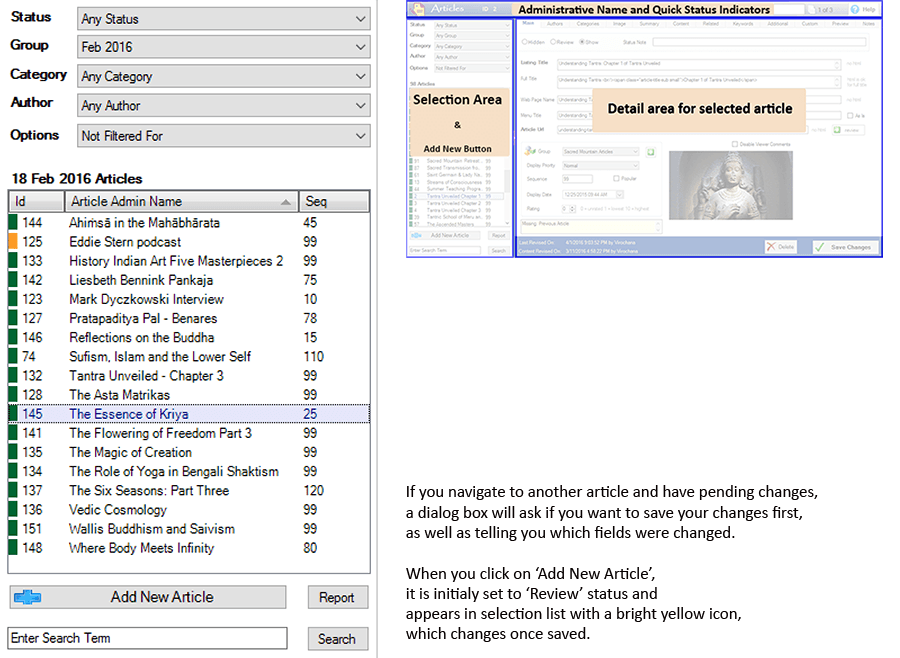
On the left side of articles management is where you filter your existing articles, and then select an article to view or edit it in the detail area. To add a New Article, click on the 'Add Article' button near the bottom. While there is a lot of power packed into this area, its use is intuitive.
You can filter by a combination of Status, Group, Author, Category, and Options. Each dropdown, such as a group, author, etc, also has an option to look for articles missing the attribute, such as 'Missing an Author'. The options drop down has lots of handy selections, for example, articles missing key fields, or articles missing a listing image, to name a few.You can also just type in one or more search terms at the bottom and hit enter.
In the list of filtered results, active articles shown on your website have a small green icon next to them. If they are featured, this turns blue; and if archived, it turns yellow. Articles in a 'Review' status have an orange icon; and hidden (inactive) articles have a red icon next to the admin name of the article in the list.
You can click on any of the columns to sort articles by that column.
The small 'Report' button in lower left opens up a filterable report in 'Reports Home', where you can save the report as a word document, adobe PDF, or as an Excel spreadsheet. This is useful as part of a workflow management, when you want to give a status update of various articles to collegues. The report includes the quick status note as well for each article.
You may adjust the spacing between the selection area and the detail area by dragging the dividing line between them. Click the small arrow in the middle of the dividing line to collapse/show the selection pane to give you more space in the main detail area if needed.
